How to Make a Dog Cone Collar? A Step-by-Step Guide
Dogs have a common reaction towards itches, wounds, and all kinds of skin intolerance. It is their habit to chew or lick the affected area, thinking that would make them feel better.
Stopping canines from these behaviors will prevent further damage or infection. We dog lovers accept that cone collars serve an essential role.
When our dogs are suffering or recovering from different health issues. If you own a dog, the good news is that you can learn how to make cones from the things you have in your home.
These ideas are straightforward and worth giving a try to make your four-legged friend feel more comfortable.
No one wants to buy cones from an expensive store. Creating your homemade cone collar will save money and gives you the chance to show your dog some love.
Again, you have the opportunity to create different styles and color them to look more fashionable. There are different types of homemade cone collars featuring varieties of materials.
However, the needed tools are scissors, markers, pen/pencil, sharp knife, seal tape, and measuring tape.
When do Dogs Need to Wear a Cone Collar?
The following circumstance will make your dog wear a cone collar
Dogs Recovering from Wounds: If your dog sustains a large cut accidentally or through a surgical incision, wearing a cone collar will prevent her from mouthing the wound and prolonging the recovering process.
Dogs with Licking and Chewing Habits: Some dogs have the behavioral problem of repetitive chewing and licking. This could result in some health problems like infection or lick granulomas. So, the collar will address this behavior and take their mouth off their body.
When Treating Yeast Infection and Skin Conditions: The skin infection will make a dog lick and chew continuously. While the skin infection is undergoing treatment, the only way to make the medication effective is to ensure your dog’s mouth does not get in touch with its skin.
Dogs with Allergies and Flea Infestation: It is natural for dogs to feel itchy when suffering from flea infestation. And in a way to react to allergies and flea bites, dogs go on to chew and lick. It can lead to open wounds and skin infections, hence the need to wear a cone collar.
Various Dog Cone Collars
It is helpful to have various types of cone collars because every situation deserves different collars.
Rigid Cone Collars
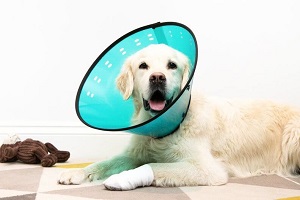
Rigid cone collars are the oldest of all. They are also called the “lampshade” collars; they fit around the circumference of your dog’s neck and extend to the tip of the nose. They are usually made from plastic and semi-flexible plastic.
They are highly functional and effective at preventing your dog from licking and chewing.
Dogs passionately hate rigid collars due to the discomfort they bring. They tend to obstruct the peripheral view and make it difficult for dogs to move around the house.
Flexible Cone Collars
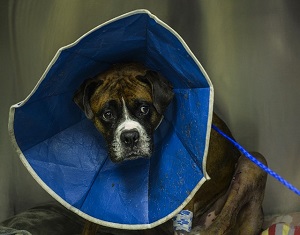
Flexible cone collars are a bit similar to rigid cones. But instead of plastic materials, they are made of flexible and softer materials.
They are made from cardboard or thin plastic and are usually padded with materials to offer extra comfort.
Dogs prefer the flexible collar as it is more comfortable and easier to wear. The flexible nature of these collars has the potential to make dogs lick and chew.
While dogs enjoy wearing flexible cone collars, they are very important to dog wound care.
Different Ways to Make DIY Dog Cone Collars
There are various ways you can follow to make a cone collar. Here we have discussed possible 4 techniques with detailed step by step guide to make your task easier
Cardboard/Carton Cone Collar
Materials: Ruler, scissors, seal tape, cardboard, and compass
Step 1
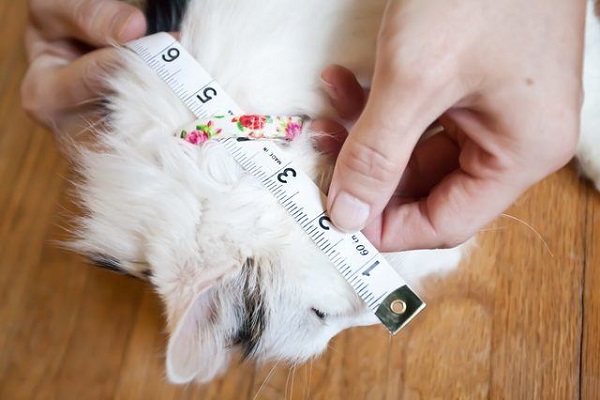
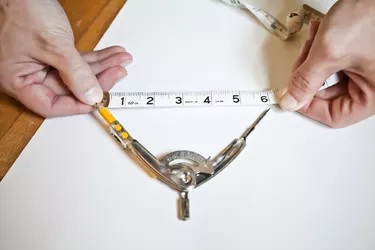
Ensure your dog has his collar on his neck; this will help you get the accurate position for the cone. Use a flexible measuring tape to take an accurate measurement from the tip of the nose to the collar rest. Add two extra inch allowance.
Step 2
Next, remove your dog’s collar and measure it. Add 1-inch allowance for easy sliding through her ear and head.

Step 3
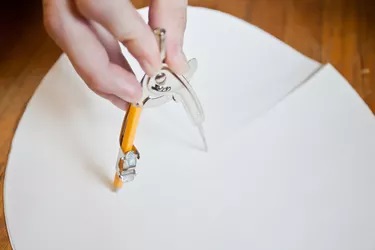
Fix a pencil or pen into the compass. Set the compass according to the nose-collar measurement. Then use the set compass to draw a circle on the cardboard.
Step 4
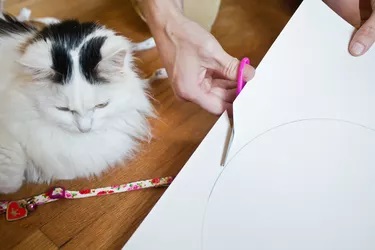
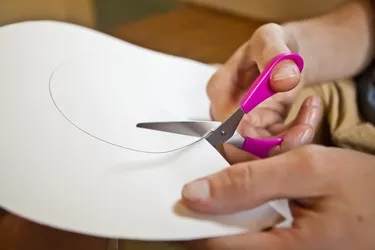
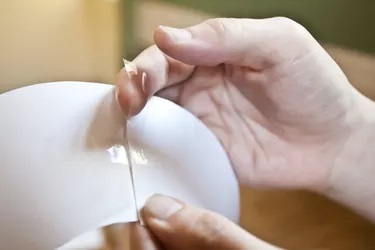
Use your scissors to cut through the traced circle.
Step 5
After cutting out the circle, set your compass according to the collar measurement, do not forget to add the 1-inch allowance. Then draw a circle in the middle of the cardboard.
Step 6
Use your scissors and carefully cut out the center circle.
Step 7
Fold the entire circle to form a cone shape and apply tape to join the edges together. Alternatively, you can use a paper stapler; make sure the pins are placed in a way that would not injure your dog.
Step 8
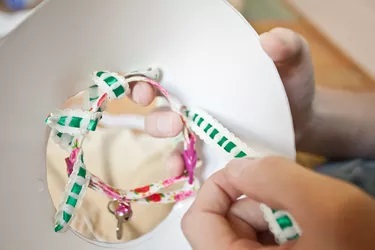
Use a punch to create about five holes around the edges of the inner circle. Ensure the holes are 1 cm away from the tip of the circle.
Step 9
Use a light ribbon to attach your dog’s collar to the cardboard cone collar. Gently run the ribbon through the holes and your dog’s collar.
Bucket Cone Collar
Material: Bucket, sturdy knife or cutter, tape, scissors, and string.
Step 1
Measure your dog’s circumference and add extra 2 inches for hassle-free wearing.
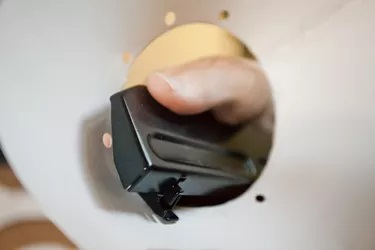
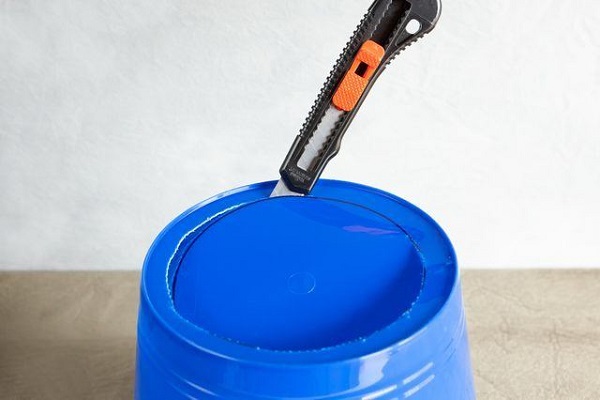
Step 2
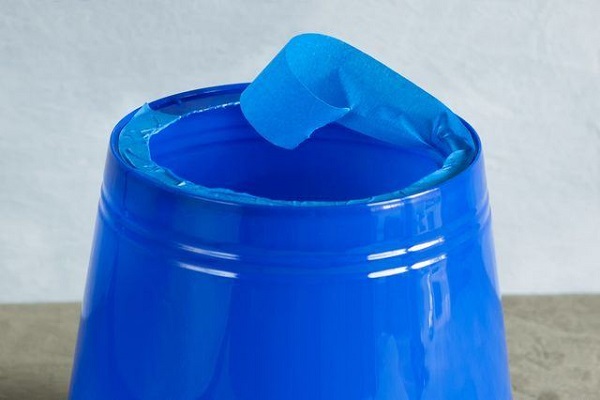
With the appropriate measurement, use a sharp knife or cutter to cut a hole on the bottom of the bucket. Cut carefully and smoothly to prevent rough edges so your dog does not feel uncomfortable.
Step 3
Use the tape to seal the edges of the bucket to prevent it from irritating your dog’s skin and coat.
Step 4
Use the tip of the scissors to punch two holes with 1-inch spacing.
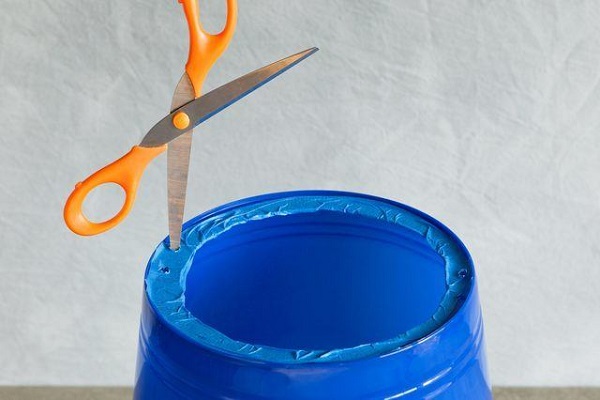
Do this on the other side of the bucket. Insert a string into the holes on both sides.
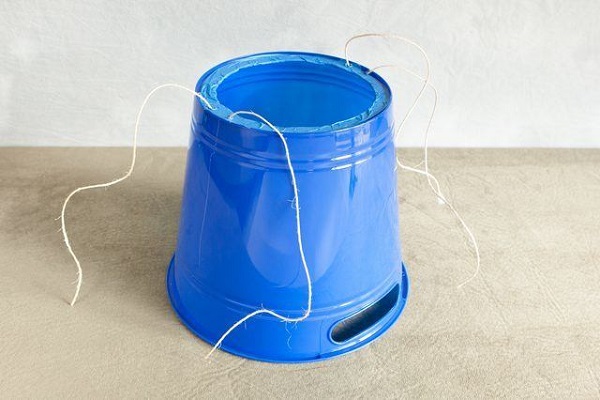
Step 5
Fix the bucket on your furry friend’s head. And to ensure the bucket doesn’t fall off, tie the strings on both sides to your dog’s collar.

Pool Noodle Collar

Materials: Pool noodle, twine, scissors, and serrated knife
Step 1
Measure your dog’s neck and add ½ inch allowance for easy sliding in and out of her head.
Step 2
Measure out the circumference of your dog’s collar on the twine rope and cut it out. Add 5 inches extra so you can tie it together at the end.
Step 3
Mark the pool noodle with a spacing of 1.5 to 2 inches. Use a serrated knife or any alternative tool to cut the marked places into pieces. The amount of pieces you want varies on the size of your dog.
Step 4
Tread the twine rope through the pieces and then bring each end of the twine together and tie. Tie firmly so it does not lose. Afterward, trim the excess twine rope.
Towel Dog Collar
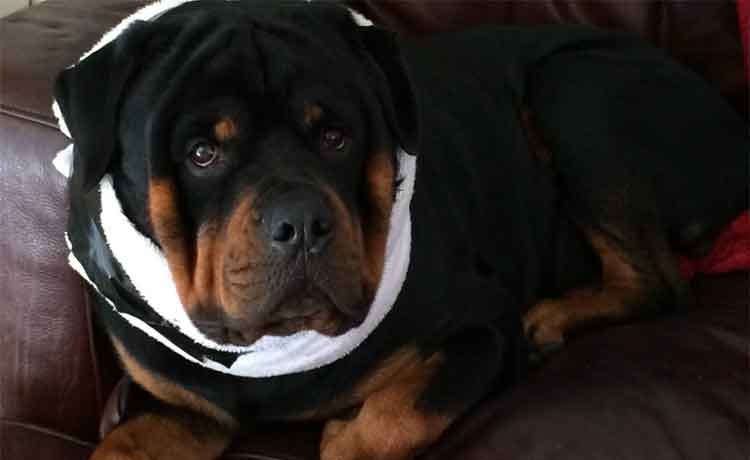
You can use an old towel or sacrifice one of your towels. Towel collars are just like soft neck cone collars
Materials: Towel and Tape
Step 1
Spread out the towel in front of you.
Step 2
Fold one side to the middle and then make the other side lap on the first side. It will look like a thick scarf.
Step 3
Cut out three medium sizes of tape and stick them to the bottom of your towel or stick them on a glossy surface closer to you.
Step 4
Start wrapping the folded towel around your dog’s neck. While wrapping, ensure the towel is above the shoulders but under the ear.
Step 5
Place the first and second pieces of tape on the top and bottom of the towel. Ensure it sticks well. Then place the last tape in the middle.
The Benefit of Using Dog Cone Collars
The usefulness of using dog cone collars is immense and some of them are noted below.
- Prevents Hot Spot: If you sight a hot spot on your dog, the smartest thing to do is to wear your dog a cone collar. The cone will block your dog’s mouth from coming in contact with the hot spot. This will prevent scratching, biting, and licking while keeping the hot spot clean, dry and aiding speedy healing.
- Protect Wounds: If your dog’s wound is located where his mouth can reach, wearing a cone will prevent him from licking the wounds. Stopping a dog from licking his wound will prevent further damage to his body. A cone collar comes in handy as a preventive measure against infection.
- Allows Healing: A cone gives uninterrupted time for healing after stitches or injuries. Often time it doesn’t take dogs a minute to lick and bite out medication. Hence the benefit of a cone collar will save you from an unplanned return trip to the vet doctor.
- Prevents Chewing and Licking Behaviors: A cone collar disciplines a dog with chewing habits. Allowing your dog to chew his body can result in wounds that can lead to secondary bacterial infection. Therefore, a cone will help address this issue without your 100% supervision.
Verdict
Nothing is more vital than the wellbeing of your canine companion. Therefore, for the safety of your dog, try these simple cone ideas and see how fast your pet will heal from wounds.
We have reasons dogs put on a cone and how to make cone collars with materials like cardboard, paper plates, towels, cartons, and buckets. We also shared various types of collars and their benefits.
Making the cone collars yourself will help you create the perfect size for your dog with unlimited styles. You can switch from one type of cone to the other while giving your dog options to aid the healing process.
Want to work on more DIY dog collar projects? Check out our guides on: