How to Make a Leather Dog Collar On Your Own
No dog accessory is a beautiful as a collar! It stylish and just a little way to show your dog love. When considering which collar to make for your dog, using leather material is the best option.
There are other alternatives such as chain metal and fabric. But for a natural and more comfortable neckline, leather stands the big chance.
When you are set to design a leather collar, have in mind that it has to be durable, comfortable, adjustable, and lightweight.
Getting the needed materials and tools for making a collar is the number one thing to consider. Purchase a leather strap or piece of hiding.
Hardware such as buckle, D-ring, and rivets are essential to make a functional leather neckline. Decorative studs, rivers, stamps, and paint are optional.
Tools can be quite pricy you’ll but need a few like rulers, scissors, mallet, hole punch, edge beveler, tack hammer, and strap cutter. The above tools will make craftwork easy and fast.
Step-by-Step Guide to Make a Leather Dog Collar?
Here is a complete guide is shown below to make the task easier of making a leather collar for your pooch from home.
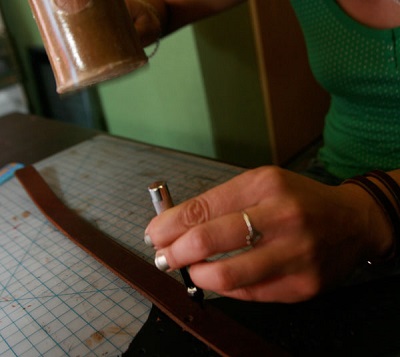
Step 1: Measure Your Dog’s Neck
If you want to make a befitting dog neckline, it’s essential to take the correct measurement of your dog’s neck.
To get a perfect size, get your dog to sit quietly and place the tape around the circumference of his neck. If you have an old collar, that makes measuring easier for you.
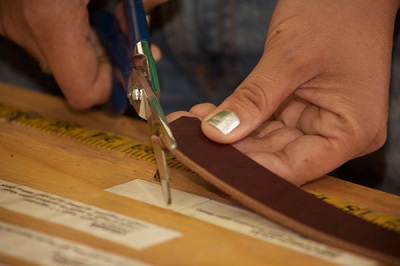
Step 2: Cut Leather
Using a leather strap cutter is the best way. You can cut according to the necessary width (1 or 1.5 inches is standard). Use a ruler to get a straight and flawless cut. The length of the collar is according to the size of your dog.
The rule of thumb is, that two fingers can comfortably slip in between the collar and the neck. You should add 3” inches on the end of the leather strap for D-ring and buckle attachment.
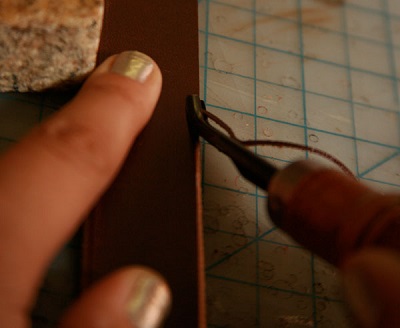
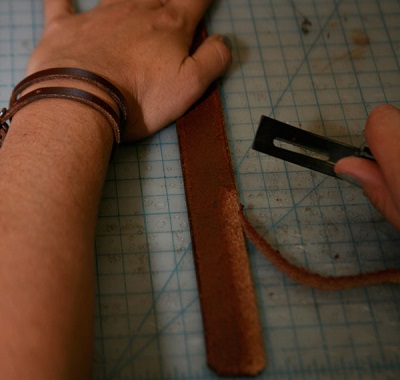
Step 3: Bevel the Edges
Afterward, cut the end of your choicest shape (v-shaped, tapered, or rounded). Trim and smoothen out the edges by gliding the beveler tool beside the edge while stripping off the rough sides.
Never rush to this stage, as it helps polish the edges. The result looks like leather spaghetti.
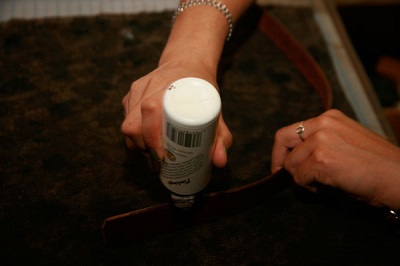
Step 4: Dye the Edges
Choose a water-based edge dye that fits the color of the leather strap. Ensure you are doing this craftwork in a ventilated room for quick dry.
Handle the dye carefully to prevent unwanted staining, and be patient for the first side to dry before get on the other side.
Step 5: Make the Holes for the Buckle and D-ring
Mark out 3 inches at the end of the collar for the buckle and D-ring attachment. Use an oblong hole punch to make one hole for the buckle pin. Make two symmetrical holes for rivets and D-ring attachment.
Step 6: Skive the Collar
Working from the thin layer of leather will make a good craft. Apply the skiving tool to scrape out about half the thickness of the strap.
Do this to the 3 inches portion that has been marked out for buckle and D-ring. It will reduce bulk and make the leather effortlessly conform to the buckle.
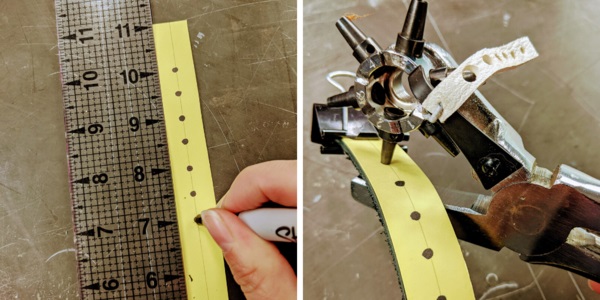
Step 7: Adding Holes for Eyelet
Dog necklines made from leather may require holes to fasten the buckles. You can do this by applying a leather hole punch. It is available at the hardware shop.
The first eyelet should be some 10cm from the buckle end of the leather. For the buckle pin and adjustment, the collar should consist of 6 holes with 1 cm spacing.
- First, make a mark for each hole with appropriate spacing
- Place the leather strap on the puncher and ensure it where you want to punch
- Hammer strike the punch at the top but, if you don’t have a puncher, punch pillar can come in handy
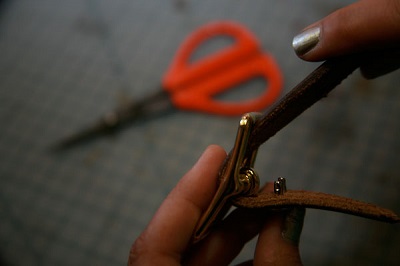
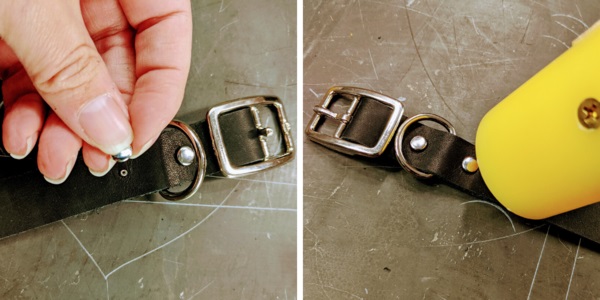
Step 8: Add the Buckles, Rivets, and D-ring
Run the punched strap through the buckle and fold the end tail. Fix the male rivet through the first and bottom layers, then top with the cap.
Endeavor to place the set rivet on a hard surface and use a mallet to hit the rivet firmly. Note, you cannot apply much pressure on the rivet. Next, set your D-ring and hammer in the last rivet.
Step 9: Treat the Leather
Taking time to treat the leather with conditioners will prolong the lifespan of the collar. Pour cream conditioner and mink oil on a rag, and rub it into the leather. Applying beeswax will prevent water from damaging the leather collar.
Step 10: Decorate
Decorating is the last but fun stage of making a leather neckline. You can stamp or design your dog’s name, fun shapes, and colors on the collar. Using stud or rivet is fantastic.
Most types of decorations depending on the thickness of the leather. The use of rivet or stud decoration on thin layers might ruin your work.
Benefits Of Using a Leather Dog Collar
Some benefits are discussed below that you can always get from the leather collar.
- Great Appearance: One of the benefits of a leather collar over every other is the classy look it has. It is fashionable for every occasion you attend with your dog. It always looks elegant regardless of how old it is. A leather neckline can be decorated with rhinestones or gems to make it more stylish.
- Durable: Leather dog collars can withstand the rigor of daily wear. They are tough and can be used for years without damage. You can save up money without stressing over replacing your dog’s collar now and then.
- Waterproof: Leather is a waterproof and reliable material. You can go on an adventure to the beach or waterlogged areas without the collar having issues. Also, your pet can play under the rain with little or no concern about the collar. Even if the collar gets soiled, a quick wash will bring it back to shape. Being waterproof increases the life span of the collar.
- Light and Comfortable: When we talk about comfort for your furry friend, then leather has it all. Unlike other collars made from different materials, leather is light and does not choke the neck. It does not pull a dog’s fur and, this prevents skin irritation that can make dogs uncomfortable.
Furthermore, the leather neckline feels relaxed and gentle against your pet’s coat. However, some leather material can be heavy for smaller dogs. It is ideal to select the one with less thickness.
Final Verdict
Leather craftwork can be overwhelming, but the outcome of creating the artwork is always worth it. Unlike other pet collars, the leather type does not pull on a dog’s fur or make him feel uncomfortable.
It is easy to clean, lightweight and pliable. You can make different sizes and styles while stocking the wardrobe with varieties. The above guidelines will make your work fast and error-free.
You can always take advantage of the old leather materials you have at home and make something adorable for your canine companion.
Just bear in mind that your dog’s safety and comfort are the most vital things to consider while you construct a collar.
Want to work on more DIY dog collar projects? Check out our guides on: